

Flow builder basics — canvas, steps, branches and variables
🎯 Goal
Build any flow yourself: add steps, connect their branches, and personalise messages with variables.
🧰 What you need
- Automation open (roles with Automation → Update edit drafts; Publish needs Automation → Publish)
The screen
Section titled “The screen”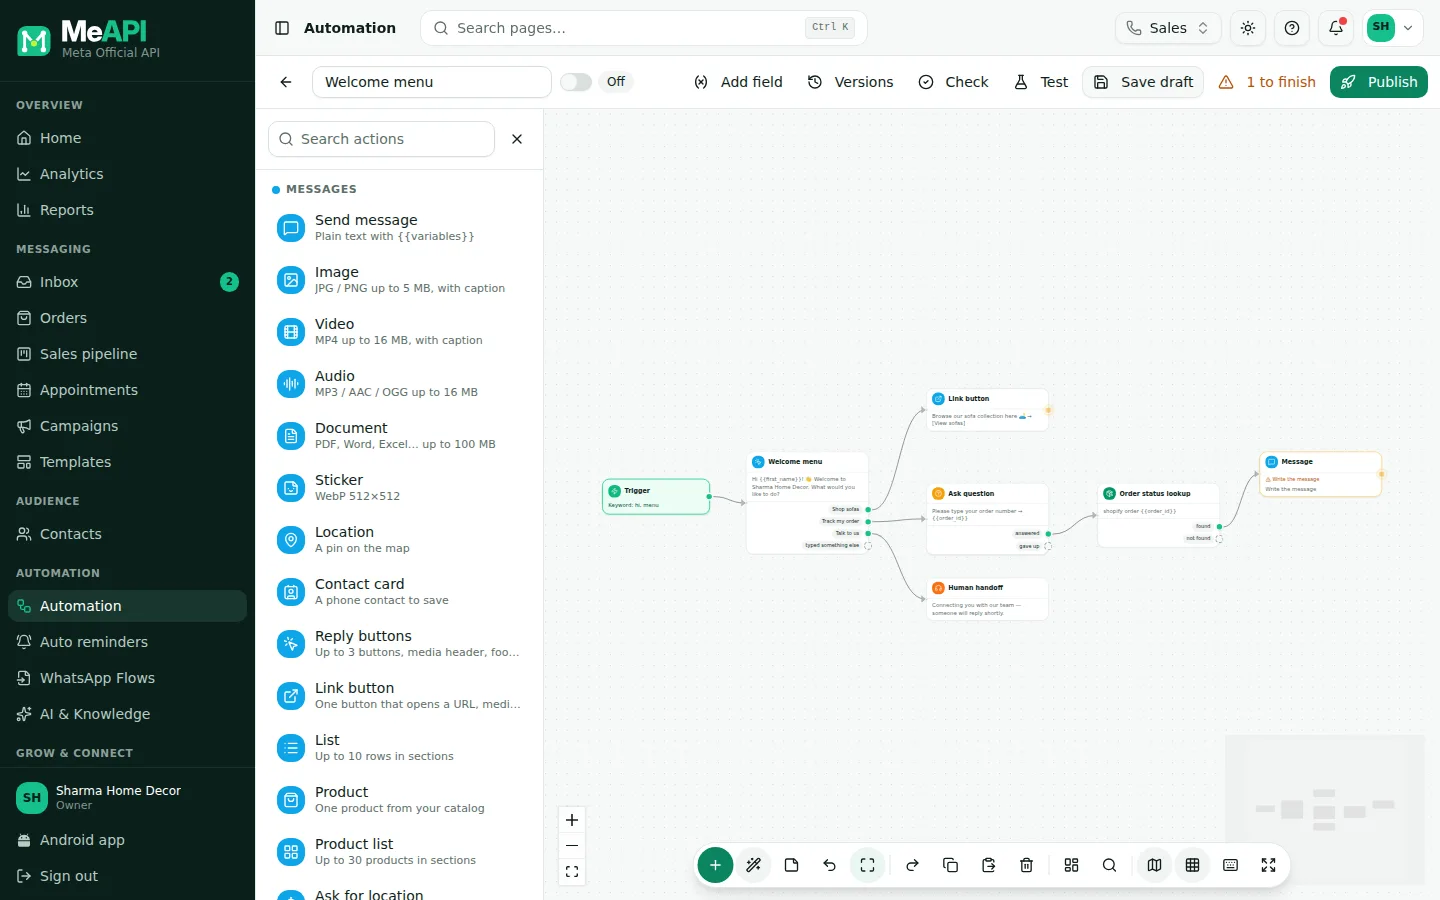
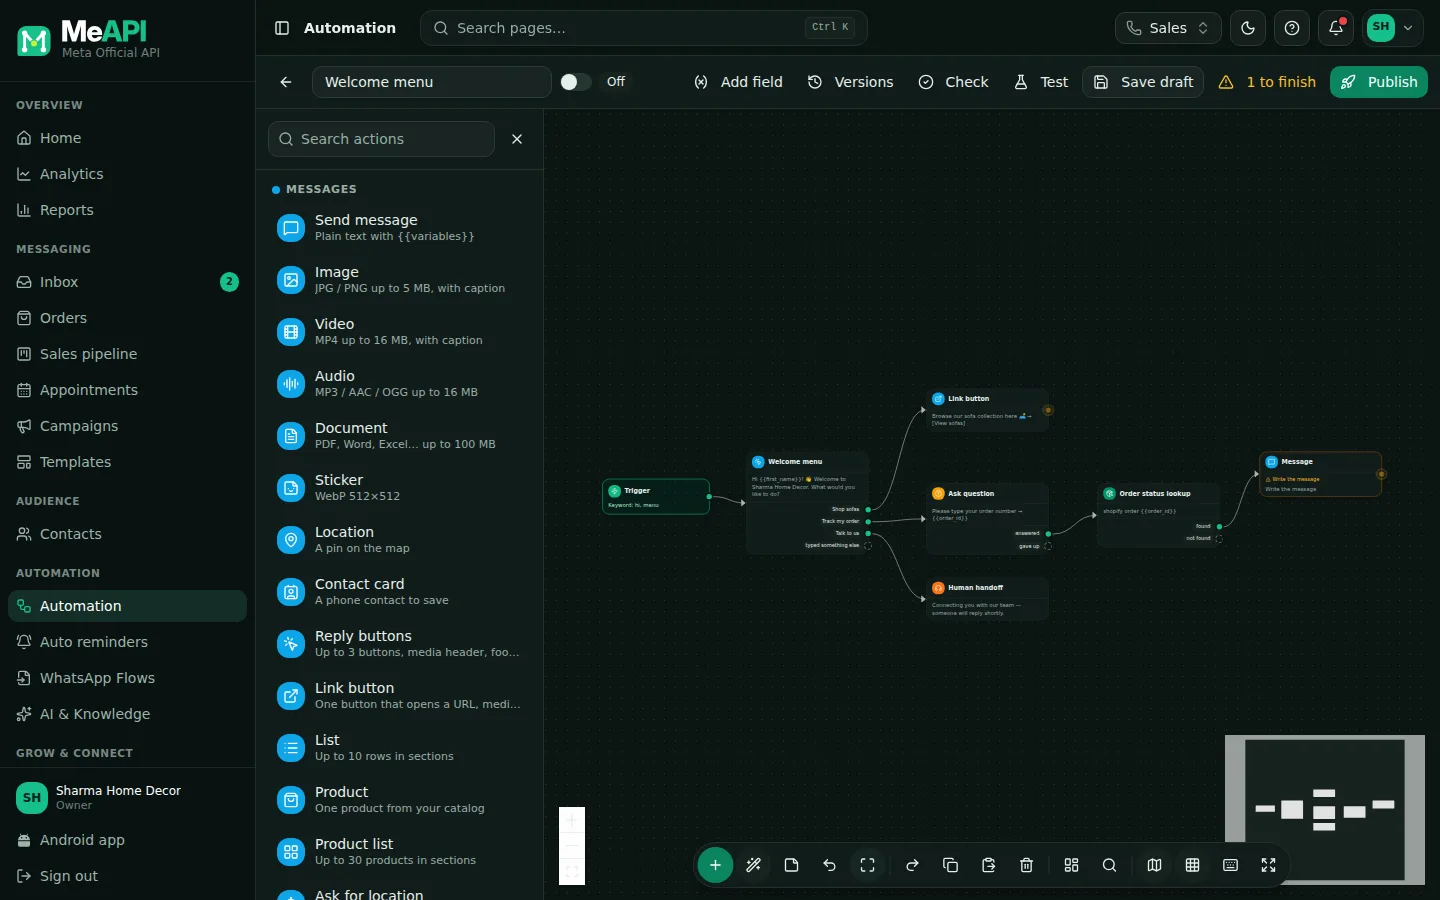
- Top bar: back arrow, the flow name and its On/Off switch, then Add field, Versions, Check, Stats (live flows only), Test, Save draft, N to finish (when steps still need content) and Publish (Publish changes once it is live).
- Left: the Bot actions panel, open by default. Search it, or browse Messages, Logic, Data, Team, Sales, AI and Commerce & apps. Collapse it to a thin rail; the builder remembers.
- Middle: the canvas uses the full width. Every step is a card with its outputs on the right; lines are the paths a chat can take.
- An output with nothing connected pulses amber when it is required. Optional fallback outputs show a grey dashed dot. The + beside any output adds a step that is already connected.
- Right: Step settings for the selected step (or the trigger, when you click Start). The small arrow on its edge collapses it.
- Floating toolbar at the bottom: add step, bot actions, note, undo, redo, copy, paste, delete, tidy up, find a step, fit to screen, minimap, snap to grid, keyboard shortcuts, full screen.
Steps: build a small flow
Section titled “Steps: build a small flow”- Automation → New chatbot. Give it a name. The canvas starts with a Start step.
- Set the trigger: click Start. The Trigger panel opens on the right. Choose Match keyword and type
price, rate. See Triggers. - Add a step: click the + beside the output dot of Start. A new step appears, already connected. Then pick Reply buttons in the Bot actions panel. Other ways: drag from the dot and let go on empty canvas (a new empty step appears there), or drag an action from the panel onto the canvas.
- Fill it in under Step settings on the right: write the body text and name the buttons Retail and Wholesale. Each button gets its own output, plus one for typed something else.
- Continue each branch: from Retail, add Send message with your price list link. From Wholesale, add Ask question (“What is your city?”) saved to
city, then Human handoff. - Click Tidy up in the toolbar to arrange everything. Click Test, type
priceand tap through the buttons in the simulator. - Save draft while you work (or Ctrl+S). Click Check for the server’s full check: problems are listed in a red bar and marked on the canvas.
- Click Publish. Add an optional note (What changed?) and confirm. The switch beside the name turns On.
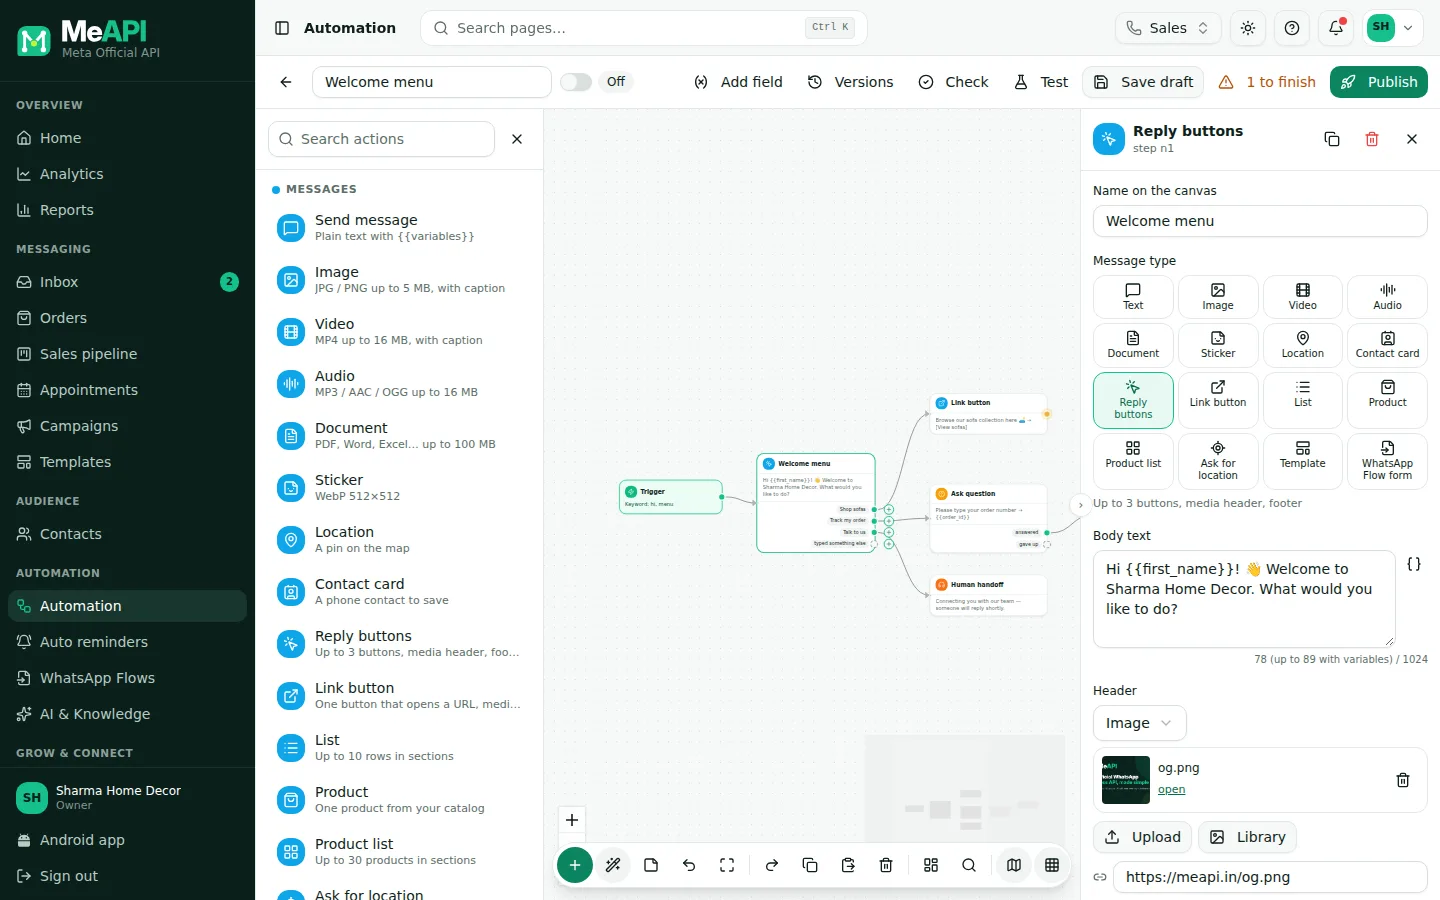
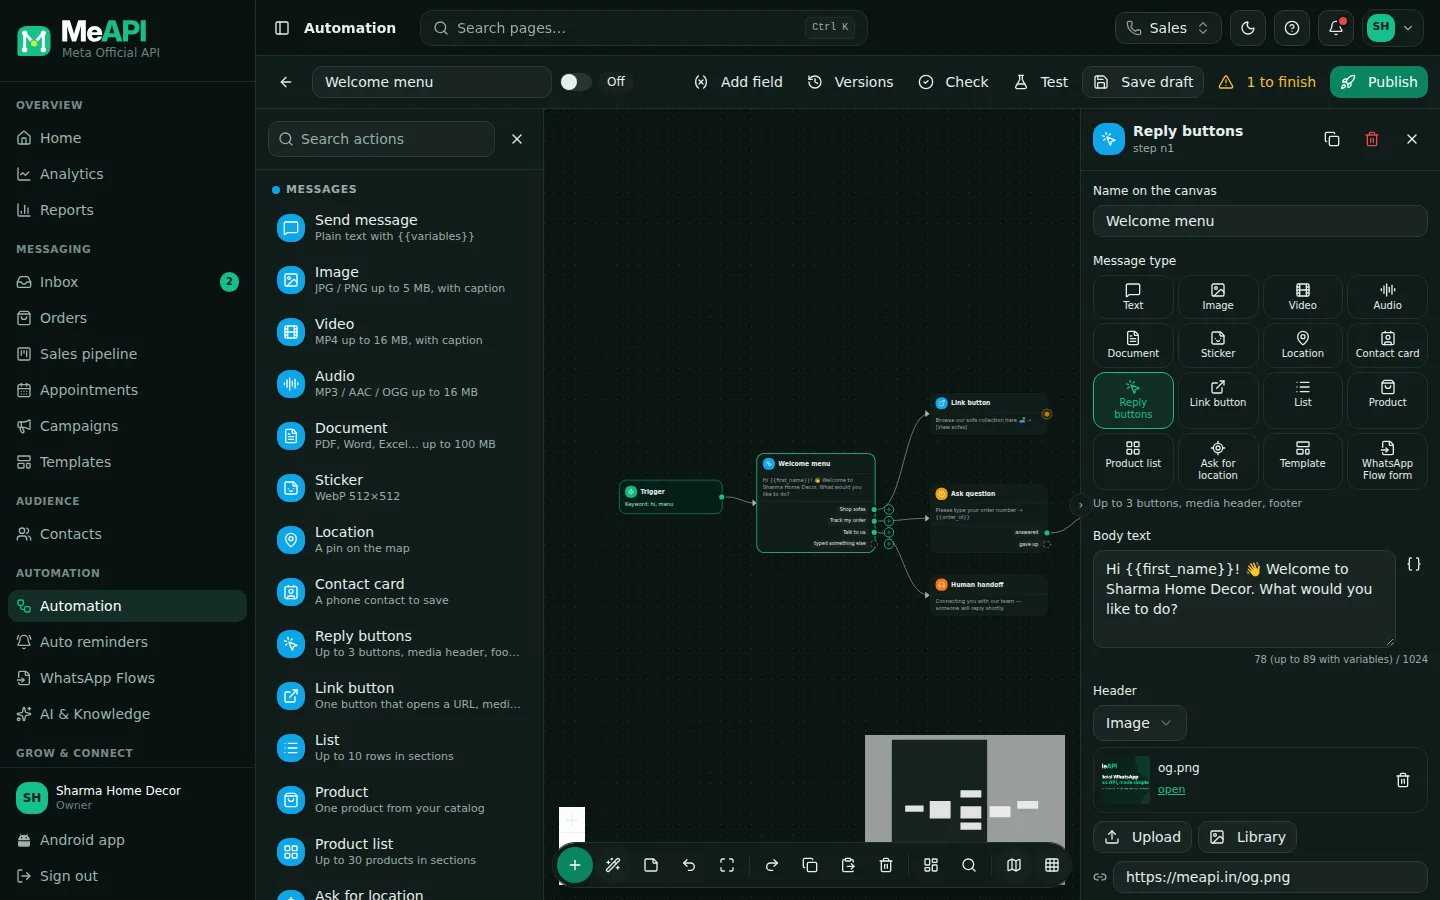
- The selected step and its Step settings panel: message type, body text, header, footer and buttons.
- Each reply button has its own output on the card, plus typed something else.
- A step still missing content has an amber border and says what is missing, for example Write the message or Pick a template.
Missing content and publishing
Section titled “Missing content and publishing”- A step that is still missing something (no text, no file, no template, no URL, no stage…) has an amber border with the reason on the card.
- The top bar shows N to finish. Click it to jump to the next unfinished step.
- Publish stays blocked until every step is finished. Then the server checks the whole flow again; anything it finds is marked in red.
Branches
Section titled “Branches”Steps that wait for the customer or check something have several outputs:
| Step | Outputs |
|---|---|
| Reply buttons, List | One per button or row, plus typed something else |
| Ask for location | location shared, typed instead |
| WhatsApp Flow form | form submitted, typed instead |
| Ask question | answered, gave up |
| Condition | yes, no |
| Smart wait | replied, no reply in time |
| AI Router | One per intent, plus other |
| A/B split, Randomizer | One per path |
| Business hours check | open, closed |
| HTTP request, Google Sheets | success, failed |
| AI reply | answered, needs human |
| Send payment link | paid, failed / expired |
| Book appointment | booked, cancelled, no time found — see Appointments |
| Order status lookup | found, not found |
| Move deal stage | moved, no deal |
An output with nothing connected ends the flow on that path.
- A required output (a button, a list row, answered, paid, yes…) pulses amber until you connect it.
- An optional fallback output shows a quiet grey dashed dot. These are typed something else / typed instead, gave up, no reply in time, failed, not found, needs human and the AI Router’s other. Leaving them open is fine.
End chatbot, Human handoff, Go to another chatbot and Go to step have no output: the flow ends or moves on there.
Variables
Section titled “Variables”Write variables in double curly braces in any text field:
| Variable | Value |
|---|---|
{{name}}, {{first_name}} |
The contact’s name / first name |
{{phone}} |
Their WhatsApp number |
{{message}} |
Their last message |
{{city}}, {{order_id}}… |
Any custom contact field, or an answer saved earlier in this run |
{{payment_amount}} |
Set by the payment step |
Answers saved with Ask question, Save variable, HTTP request mappings or forms become variables for later steps. Turn on saving to the contact to keep them for future flows and campaigns.
Connections
Section titled “Connections”- Connect: drag from an output dot to the next step, or click the + beside the dot. Each output holds one line; connecting it again replaces the old line.
- Hover a line to highlight it. The red × in its middle deletes it.
- Re-route: drag a line’s end onto another step.
On a phone or tablet
Section titled “On a phone or tablet”The builder works with a finger too, in the browser and in the MeAPI Android app. Nothing needs dragging:
- The flow opens on its first step at a readable size. Pinch to zoom, swipe to move around, and tap Zoom to fit (the square in the toolbar) to see every step.
- Tap a step to edit it full screen. The settings scroll; Save draft and Done stay at the bottom.
- At the end of a step, What happens next lists each button or path and where it leads. Tap Add step beside one, pick an action, and the new step is connected for you. Tap a step’s name in that list to jump to it.
- The toolbar shows Add a step, Bot actions, Undo, Zoom to fit and ⋯. Tap ⋯ for redo, copy and paste, tidy up and the rest. In the top bar, ⋯ holds Check the flow, Versions, Add a contact field and Stats. Test, Save draft and Publish are always visible.
- If Publish finds a step that is not finished, it opens that step and says what is still to do.
Handy shortcuts
Section titled “Handy shortcuts”Delete (or Backspace) removes the selection · Ctrl+Z undo · Ctrl+Y or Ctrl+Shift+Z redo · Ctrl+C / Ctrl+V copy and paste steps · Ctrl+S save draft · Shift-drag selects several steps · Find a step searches by text. The keyboard button in the toolbar lists them all (⌘ on a Mac).
Tidy up auto-arranges the whole flow. Fit to screen zooms to show every step. Minimap and Snap to grid can be switched on or off in the toolbar, and Full screen hides everything but the builder. The builder remembers these choices, and whether the Bot actions panel is open, in this browser.
Add field in the top bar creates a new custom contact field without leaving the builder.
Common mistakes
Section titled “Common mistakes”- Unconnected buttons. A button with no next step just ends the chat. Connect every amber output, even to a simple Thanks! message.
- Waiting steps in a rule. Run-alongside flows can’t wait for answers. The panel refuses them: Not available in a run-alongside flow. Use a chatbot.
- Forgetting to publish. Save draft only saves. Customers get the flow after Publish.
- Misspelt variables.
{{frist_name}}is sent literally. Pick variables from the insert menu.
What’s next
Section titled “What’s next”Was this page helpful?
Thank you — we read every comment.
Could not send right now. Please try again later.
© 2026 MeAPI by TheWebStore028 · RADHAMADHAV WEBSTORE LLP · GSTIN 27ABJFR6148J1ZO · Contact us ·Cookie settings